12 Starting Stendhal
12.1 Introduction
At the start of the first team coursework exercise, a GitLab repository will have been created for your team, containing the code base that you will work with across the semester. This repository contains a version of the source code for Stendhal: a multi-player online adventure game. It is built on top of the Marauroa game engine that we work with in the early workshops for the course unit. Although it is a game, Stendhal functions much like the kinds of software systems that keep industry, governments and the non-profit sector functioning. It is a multi-user, multi-threaded, client-server system that uses secure sockets to communicate over the Web. It also implements many business rules, and must manage stored data using a database. It therefore provides us with a good training base for learning modern software engineering skills.
In the first team study Sessions, you’ll meet your team and get your first look at the code base we’re going to be working with. After spending some time getting to know your fellow team members, please work through sections 1–3 of this document. By the end of this, you should all have a clone of the repository on your VM.
If that all works smoothly for you all, you can start working through sections 4–8 together. Those sections show you how to build the system when you make changes, how to run the server and client for the game, and how to run the tests. But some of you may have technical difficulties that will take a few days to sort out. So don’t worry if you don’t get very far through those sections on the first day.
In the second team study session, you can get started on the coursework. Instructions for that will be made available on that day and the issues your team will need to solve will be copied to your repositories ahead of that team study session.
So, in the team study session, you should finish working through steps 4–8 of this document, and should look at the coursework instructions to begin planning how you will work together to complete the tasks by the deadline.
After completing the steps in this document, every team member should be able to achieve the following core tasks Within the IDE selected by your team:
- Acquire a local copy of the code (by cloning your team’s Stendhal repository from GitLab).
- Figure out how to build the Stendhal components (both client and server).
- Figure out how to run the tests for Stendhal, and how to see the results.
- Figure out how to run the code for Stendhal on your local machine, so you can see the effects of your changes in the game.
This document will guide you through the steps needed to achieve this goal. You should meet online with your team, using your preferred online meeting tool, and work through the document together. For this activity, everyone in the team should carry out the steps on their own machine. You might choose to have one team member share their screen while everyone carries out the steps at the same time, so everyone can see what the outcome of each step should be. (But be aware that step 3, cloning the code base, may take some time, especially if many students are accessing the GitLab server at the same time.)
ℹ️ Note ℹ️
Working As a Remote Team
For this first activity together as a team, you’ll need to experiment with some ways of organising yourselves so that you can collaborate effectively on the project together, while some of you may be located remotely. Fully or partially remote software development teams are now commonplace in industry. This coursework gives you a chance to experience some of the challenges and opportunities of this way of working. How will you communicate with each other? How will you know who is working on what? What will you do if a team member gets stuck? How will you give and ask for help? How can you prevent people online feeling like second-class citizens?
Remember that everyone will be working on different equipment and in different environments. Be patient if someone seems to be falling behind. They may be working on a slow machine, or over a low bandwidth connection. Be kind if someone seems to be struggling. They may not have a quiet place to work, or may be worried about their health or the health of family members.
Everyone in the team needs to feel comfortable about reporting difficulties with carrying out any part of the work to the team, so that you can support one another. Think now about how you personally can create a culture of trust and respect within your team. Think about your tone of voice and choice of words when speaking. Think about how you can listen actively and productively when other people speak. How can you make sure that everyone’s voice is heard and everyone’s talents are recognised?
You can find lots more information about the code and the game on the main Stendhal website at:
On this website, you’ll find a development guide plus lots of end-user documentation and a wiki describing the world in which the game is set.
12.2 Choosing an IDE
Probably the first thing your team needs to do is agree what IDE you will use. You are welcome to use any Java IDE for your team, but you must use a proper IDE. Glorified text editors are not accepted for this coursework. This is not because IDEs are always better for all tasks. The aim is to ensure that you all have experience of working in depth with at least one IDE, so that you can understand the strengths and weaknesses, compared to other, simpler development environments.
It is recommended that you choose a single IDE that the whole team uses. It is perfectly possible for different team members to use different IDEs, and we don’t disallow this. But it adds an extra layer of complexity to the process of shared coding, and requires a certain level of confidence with Git and the IDEs in question to work. (For example, you’ll need to decide whether to put the configuration files for all IDEs used under version control, and to make sure that none of these share the same name.) Since you’ll be facing plenty of other technical and team work challenges in this coursework, you may wish to avoid adding extra, unnecessary complications to your team’s workflow. All agreeing to use the same IDE is one way to do this.
As mentioned elsewhere, although teams are welcome to choose any of the standard Java IDEs, we are only able to provide technical support for 2022-12 on Linux for this coursework exercise. The Stendhal team use Eclipse, and so the code is already set up as an Eclipse project. If you use this IDE, the project will come all ready set up for you. If you choose another IDE, you’ll have some set up work to do for yourselves, to get the project into the right configuration.
12.3 Acquiring the Code
We have set up a repository for each team on the school’s GitLab server. This contains a close copy of the actual Stendhal code base. We’ve make some changes to make the code base more suitable for the work you are going to be doing with it. The extent and nature of the changes will be different every year. For this year, with students working remotely on their own machines, we’ve had to take the drastic action of removing all the commit history, to convert the repository from it’s usual 1.5Gb size to something more manageable. We’ve also removed some large binary files that were not needed for the coursework you will be doing.
You will have been e-mailed with a link to your team’s repository when it was created. The first step is for each team member to make a local clone of this repository in their own account (preferably in the VM supplied by the Department). You might want to do this as a team exercise, initially, with team members grouped around a single machine. But all of you will eventually need to carry out these steps in your own filespace before you can get started on the coursework.
To make a local clone, you should follow the same set of steps we used in the first individual coursework (and in the workshops in week 1, for those of you who will have completed the workshop by the time of this team study session). Check back to the coursework instructions if you can’t remember the details or if you have not yet completed it or the week 1 workshops.
You can get the URI for your team’s repository by logging onto GitLab, finding the Stendhal project in your Projects list and navigating to its main page. You’ll be able to copy the URI onto your clipboard from here, using the blue Clone button. You can use either protocol2
You will need to select a branch to checkout when you create the clone. The Stendhal team use the master branch as their main development branch. We’ll choose that as our starting point, too.
If you have difficulties in creating the clone, see the trouble shooting guide in our online Lab Help wiki:
- Index for trouble-shooting from error messages: wiki.cs.manchester.ac.uk/index.php/LabHelp:Errors
- Index for trouble-shooting from more general symptoms: wiki.cs.manchester.ac.uk/index.php/LabHelp:Symptoms
12.4 Building the Code
Since the version of Stendhal we are working with uses Java as the main implementation technology, the built-in Eclipse Java compiler will be able to compile the source files for you, without your needing to request it. (In fact, like most IDEs, Eclipse will automatically recompile source files after each small code change, so that errors can be highlighted in the source, while you are typing — a very useful facility.)
But, as we saw in the workshops in week 1, there is more to building a system than just compiling the Java classes. The Stendhal team use an Ant script to describe how to build their system. We showed you how to do this for the Marauroa code base in the workshops in week 1 see Building and Testing Marauroa in chapter 1. You should apply the same approach to invoke Ant to build the Stendhal code base.
12.5 Running the Test Suite
There are two ways to run the test suite for Stendhal, and you should become familiar with both of them.
12.5.1 Running the Test Suite Through Ant
First, run the test suite using the Ant build file. This will set up everything needed to run the test suite (including the necessary database configuration files).
To do this, follow the same procedures we used in the week 1 workshop to run the Maraurao tests, using the Ant view within Eclipse. Open the Ant view and add the Stendhal project build file to the view. Open up the list of targets and look over them quickly. There are several targets that appear to be related to tests in the Stendhal Ant build file. The target you should use is the one called test. All other targets containing the word “test” are intermediate targets and you should not run them directly.
Notice that the process of compiling the code and running the full test suite takes a little while (as did cloning the repository). Depending on the load on the network, this can take anything between 3 and 10 minutes to run. With such a large code base and test suite, we have to factor compilation and test running times into the way we work, since they introduce a noticeable delay.
12.5.2 Run the Tests Using the Eclipse JUnit Plugin
The second approach is to run the tests within Eclipse using the JUnit plug-in and a Run Configuration. This is a little more complicated than running the tests through JUnit in the first individual coursework, because we need to configure the class path and the database. Instructions on how to do this can be found on the Stendhal wiki at:
stendhalgame.org/wiki/Stendhal_on_Eclipse#Running_JUnit_Tests_in_Eclipse
These instructions are mostly correct, but you’ll notice some slight changes when working in the newer version of Eclipse that we are using. See the box below for details.
ℹ️ Note ℹ️
The version of Eclipse we are using already puts all the Jars on the classpath for your JUnit configuration. You can skip that step.
However, you still need to add the root folder, as described. On some operating systems, you won’t find a tab labelled “Classpath” in your Eclipse run configuration wizard. Instead, it is called “Dependencies”.
On these same platforms, you should click on “Classpath Entries” instead of “User Entries” to add the root folder.
Be sure to follow the instructions carefully, or you may find that the test suite does not run. It is especially important that you set the class path correctly, and include the project root folder on the class path. As well as allowing classes to be found and run, this allows the Stendhal server to locate the XML configuration files that contain important details of the game world, including items, creatures, zones and locations.
Check the Department’s Lab Help Wikiif you have problems. There are several pages there for help specifically with working with the Stendhal code base.
⚠️ Caution ⚠️
Run the Tests Using Ant First
If you decided to run the tests through the JUnit plugin before running them through Ant, you may have been surprised to notice a significant number of errors cropping up, causing many of the tests to fail or be blocked. This is because you do not have the correct configuration files set up to be able to access the database that forms the back-end storage of the game. The Ant build script includes instructions to check whether the required configuration file exists, and to create it if it does not. This shows a advantage of an automated build tool like Ant, over a simple test harness like JUnit.
You should immediately notice some benefits to running the test suite through Eclipse with a Run Configuration, compared to running the tests from Ant. On the console window, you will see the logger output from running the tests, which can be very helpful in tracking down the cause of failing tests. And the results of all the tests will be visible in the JUnit window, in a way that allows easy navigation between the test case failure and the code under test.
Take a look at the results from executing the test suite through the Eclipse JUnit plugin. We’ve set up the repository so that all the tests should pass, so you should see a green bar in JUnit. However, as is not unusual in large complex code bases, there is one test that seems to be failing intermittently on some platforms. If this happens with your team, please report it to Anas. We’ll supply you with a fix.
12.5.3 Running Individual Tests Using the Eclipse JUnit Plugin
The run configuration we’ve just set up allows us to execute the complete Stendhal test suite. Often, when developing, we want to execute the tests within a single Java test class, to avoid the delay involved in waiting for the whole test suite to execute.
As mentioned, with a larger, more complex software system, we can’t just right click on individual tests in Stendhal and expect to be able to run them “As JUnit Tests”, as we did in the individual coursework. Any test case that needs access to the game data that is configured through the XML files, or that is stored in the game database, needs to have the class path set up with the root folder of the project on the path, for example.
Therefore, if you want to run the tests in an individual Java test class, you have to create a run configuration for that class, just as you did for the whole test suite. Remember to add the Jar files to the class path (if your IDE doesn’t already do that), and the project root, to allow the test cases access to the data they need to do their job.
12.6 Running the Code
The final step is to run the code on your local machine. Note that you should not run the public version of the Stendhal game. Instead, you must run the version that is built from your local copy of the code, and that connects to your local copy of the game database. Otherwise, any changes you make to the code will not be visible in the code that we run.
To run your local Stendhal, you’ll need to set up two new run configurations in Eclipse, in addition to the run configuration you set up for the JUnit tests earlier. One of these run configurations will start a Stendhal server running on your local machine, and the other will run a client on your local machine.
Help with doing both these things in Eclipse is available from the Stendhal wiki, at:
stendhalgame.org/wiki/Stendhal_on_Eclipse#Start_StendhalServer
stendhalgame.org/wiki/Stendhal_on_Eclipse#Start_Stendhal_Client
The process is straightforward if you follow the instructions carefully, bearing in mind the slight changes to the Eclipse interface mentioned when we set up the testing configuration. You can also check the Department’s Lab Help Wiki, if you have problems. We’ve put pages there to help with the most common errors students make while carrying out this process.
ℹ️ Note ℹ️
Run Configurations vs Debug Configurations
The instructions from the Stendhal team suggest you create Debug Configurations. Instead, we suggest for now you create Run Configurations. The only difference is that when we run the code using debug configuration, Eclipse will stop and launch the built-in debugger whenever a breakpoint is reached, while with a run configuration breakpoints are ignored. You shouldn’t need to use the debugger for most of the work you do with Stendhal, so run configurations are the most appropriate. And you can always run the configurations you create as debug configurations later, should you need to.
12.7 Creating a Local Stendhal Account
When you have run both the server and the client, you will need to create an account on your server to use in manual testing. Use localhost as the name of the server to connect to (since you want to connect to the server running on the machine you are using, and not the public Stendhal game server). Keep the default port number that is already filled in on the form. You can choose your own username and password. These will be stored in the local database for your server, so you won’t need to re-enter them next time you log in. (Obviously, you should not} use your university username and password for this purpose.)

Figure 12.1: Create local Stendhal account
When you login with this account, be sure to use localhost as the server address:
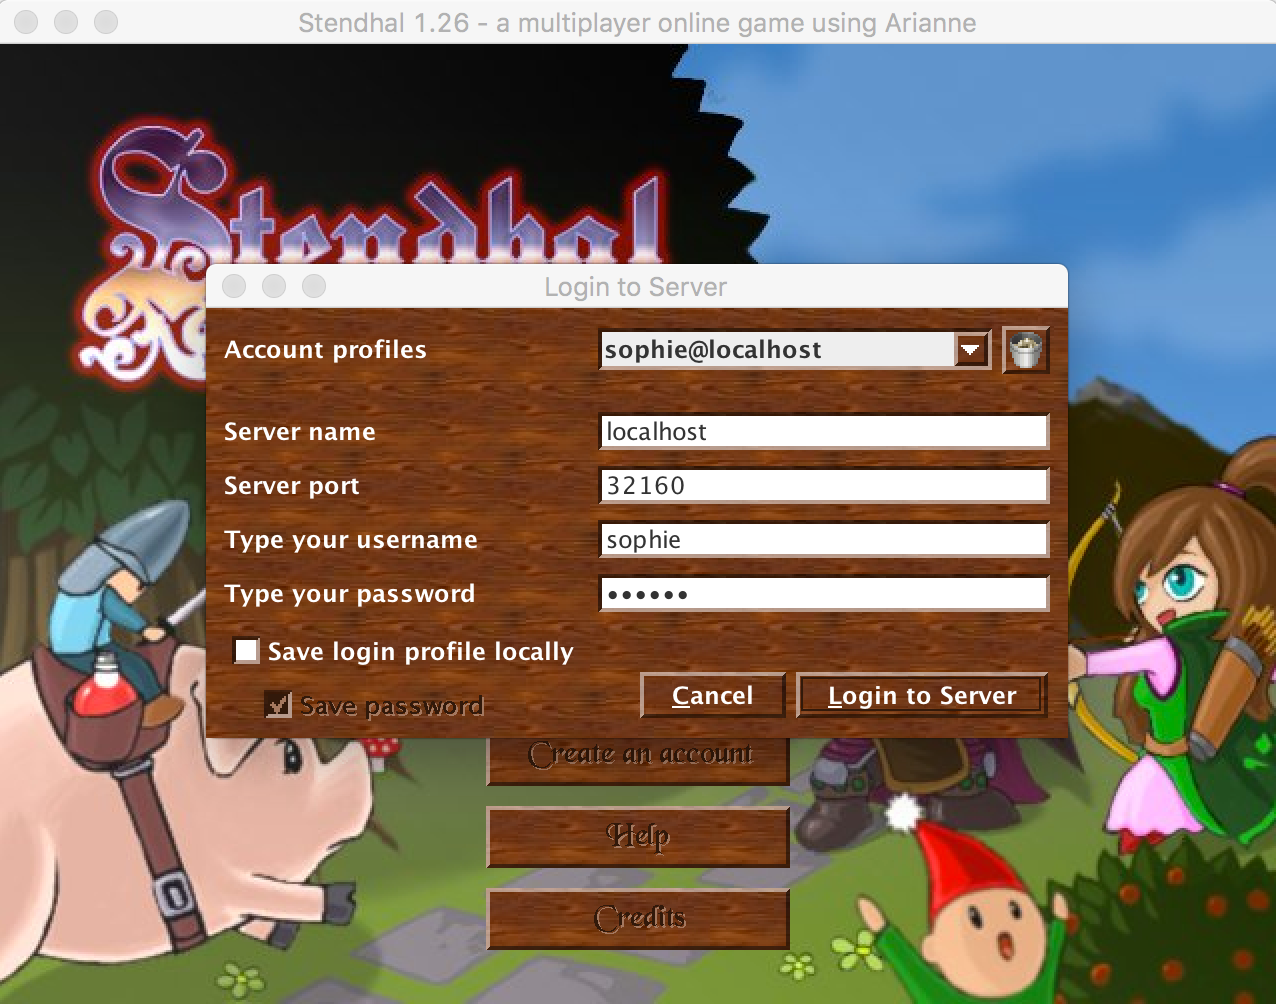
Figure 12.2: Login to local Stendhal account
If you use the main Stendhal game server address, you will be connecting your local client to the public version of the server, running on a machine outside the University, and you won’t see the effects of any changes you have made to your copy of the code.
ℹ️ Note ℹ️
Important Note about Running Stendhal
It is not necessary for this coursework to run Stendhal in true multiplayer mode, on a public server. Nor is it necessary for you to set up and host your own public server. You should run a local server on your machine and connect to that for all manual testing needed in this coursework. If you need to test a feature that requires the interaction between two players, you can run two copies of your client on your local machine, connecting both to your local server. (The good news about this is that you won’t use a network at all, so you can run the game, and test your changes, regardless of any network downtime or overloading.)
Finally, it is not necessary to play the Stendhal game to complete this coursework, any more than it would be necessary to take out house insurance when maintaining software for an insurance company, or to be x-rayed when working on software that controls medical scanning equipment. You’ll need to run the game, and try out specific features, but later we’ll look at special testing features embedded in the game to allow you to bypass the need for anything but the shortest trial sessions with the game.
12.8 Getting to Know the Code
When you can run the version of Stendhal that is in your repository, you can try out some code changes and see if you can see their effects when you run the code. Here are some examples you can try.
Can you work out how to make Hayunn Naratha, the first non-player character you meet in the game, give lots of experience points and/or money when you talk to him? Can you change his greeting?
How about changing the prices of the items being sold in Semos city—by Carmen, Margaret (in the Inn) and Xoderos (in the Blacksmiths near to Carmen), so everything is really cheap? To get to Semos from the game starting point, leave the guard house and follow the path down and left.
Can you change how many health points you get from eating or drinking the items sold by Margaret? Or make the player receive the health points faster?
A suggested approach to making these changes is:
- Run the game to see how the component you are trying to change works. All the suggested changes are based around items and characters that you will encounter within the first few minutes of playing the game. Don’t try to complete any quests or interactions with the other non-player characters. Just focus on seeing the specific functionality you are trying to change in action.
- While interacting with the game, note down keywords that can help you locate the code you are looking for. Character names, item names and location names are all useful pointers.
- Use the keyword search facility in your IDE to locate candidate files/lines to examine. In Eclipse, use the Search > File Search menu command to search for keywords occurring anywhere within your repository. Hint: remember to look at configuration files as well as program code. Not all of the game’s functionality is described in Java code.
- Make the changes to the code, save and rebuild. Don’t commit, and certainly don’t push your changes, as we are just experimenting at this stage.
- Run the tests to make sure you haven’t broken anything that used to work.
- Shutdown and restart your local Stendhal server, so that the version you are running definitely contains the changes you made.
- Shutdown and restart your local Stendhal client, so that the version you are running definitely contains any changes you made. Make sure you connect to your local server when you next log in.
- Go to the place in the game where you made the change, and see if the new behaviour is as you expect.
When you’ve worked through these exercises as a team, you are ready to get working on the coursework. Don’t forget to undo any changes you’ve made while experimenting, so that you can start the coursework from a clean version of the code. (The quickest way to do this is to checkout any files you have changed, so that they are overwritten with the version from the master branch. In Eclipse, this can be done by right-clicking on your project name in the Package Explorer view, and selecting the Replace with > HEAD revision option.)
ℹ️ Note ℹ️
Important Note for Open Source Coders
The code base that we have provided you with for this coursework is not the same as the public Stendhal project code base. Each year, we make some changes to suit the purposes of the coursework. This year, we have made quite drastic changes, to cope with the change to remote learning.
All this means that, if you are interested in contributing some code to the Stendhal project, you should first get a clean and up-to-date copy of their actual code base to work from. The bulk of the code base we are working from is the same, but there are just enough differences to mean that any patch/pull request you create might not be usable (or even recognisable as useful) by the Stendhal team.
The Stendhal dev team are very welcoming, and say they will be very happy to receive contributions from any student taking COMP23311. Information about how to contribute can be found on the Stendhal Game website.
Good luck!